Saturday, April 7, 2012

Coloring eggs with a whisk

This is brilliant! I will never color eggs without a whisk again. Wish I would have thought of this years ago. Even my (almost) two year old thought it was so much fun. And my daughter, who hates getting her fingers dirty, loved coloring eggs this year!


Here is the original pin:

Friday, April 6, 2012

Spaghetti hot dogs

This is one of those pins I've been wanting to try. So my daughter had a friend over so why not try it?


All you need is hot dogs, raw spaghetti and a boiling pot of water.


I cut the hot dogs into thirds. You could do fourths if you want to. The trickiest part of this was getting to noodles straight through the hot dogs. Mine went through the sides more than I'd like to admit!

Once your happy with how much spaghetti aka "hair" as my daughter and her friend called it, put it in the boiling water.


Boil as long as directed on the spaghetti box. When done, pull out the hotdogs with tongs and serve immediately.

Make sure to eat the "hair" first - its the best part!


Here is the original pin:

Monday, April 2, 2012

Brownies in an egg/mini egg brownies

I had a brownie mix and a few extra minutes so I decided to try two pins using brownies and Easter.

My brother of all people sent me a link to a web site a few months back with a recipe to bake brownies inside an egg shell. I'm always up for a fun challenge like that. I filed the website away (this was before Pinterest) and forgot about it. Last week, I saw a pin with the recipe. I had to try it. I'm bringing dessert to Easter on Sunday but didn't want to try this Saturday and have it flop.

I blew out an egg and rinsed it out. I then added a little olive oil and shook it around to coat the inside of the egg. Then I poured out the excess oil. I then filled the egg with the pre made brownie mix (I like either the giradelli mix or the one with the pouch of real Hershey syrup). I filled the egg 3/4 of the way full. Turned out it was too much. Next time I will only fill it 1/2 way. I didn't realize how much brownies expand while baking. I baked the egg, on its side in a glass bowl, for 20 minutes. I ended up baking it for a total of 25 minutes. My daughter was so excited to try it. She was nice enough to volunteer to crack it open and eat the brownie for her dessert!

I am a mini egg junkie. Thank goodness they are only available a couple months a year! When I saw a pin using mini eggs, I had to try it.

Mini egg brownies

1 box brownie mix, made as directed (or a from scratch recipe)
1 bag mini eggs

Pour brownie mix into pan as directed on box or recipe. Pour mini eggs over batter. Bake as directed.

The mini eggs end up baking into the batter and get sort of absorbed into the brownies. They tasted really good, but to be honest, I don't know if I will make this again. I couldn't taste the distinctness of the mini eggs that I love so much. But this gives me some ideas. I'm thinking of trying this with the caramel bits they sell in the chocolate chip isle and with the new mini peanut butter cups. I'll keep the blog posted when I try that and add my own original pin!

Original egg brownie pin:


Original mini egg brownie pin:


Sour cream chicken

Today was one of those busy nights. I needed something that could be in the table in less than 30 minutes. I found it with this recipe. And it got thumbs up from the whole family. I served it with peas and chicken rice-a-roni.

Sour cream chicken
1 package chicken breast (4)
1/2 cup sour cream (recipe says you can also use mayo or plain Greek yogurt)
1/4 cup Parmesan cheese
4 Tablespoons Italian bread crumbs

Preheat oven to 425. Line a baking dish with parchment paper (I used a glass 13x9 pan - the parchment makes clean up very easy). In a small bowl, mix together the sour cream and cheese. Place the chicken in the bottom of the pan. Spread the sour cream/cheese mixture evenly over the top of the chicken. Sprinkle the bread crumbs over the top. Bake for 20 min (or until juices run clear).

If you time it right, once you throw in the chicken, immediately start the rice and they will be done within minutes of each other!

Here is the original pin:

Friday, March 23, 2012

Teacher Appreciation Day - 2 pins used!

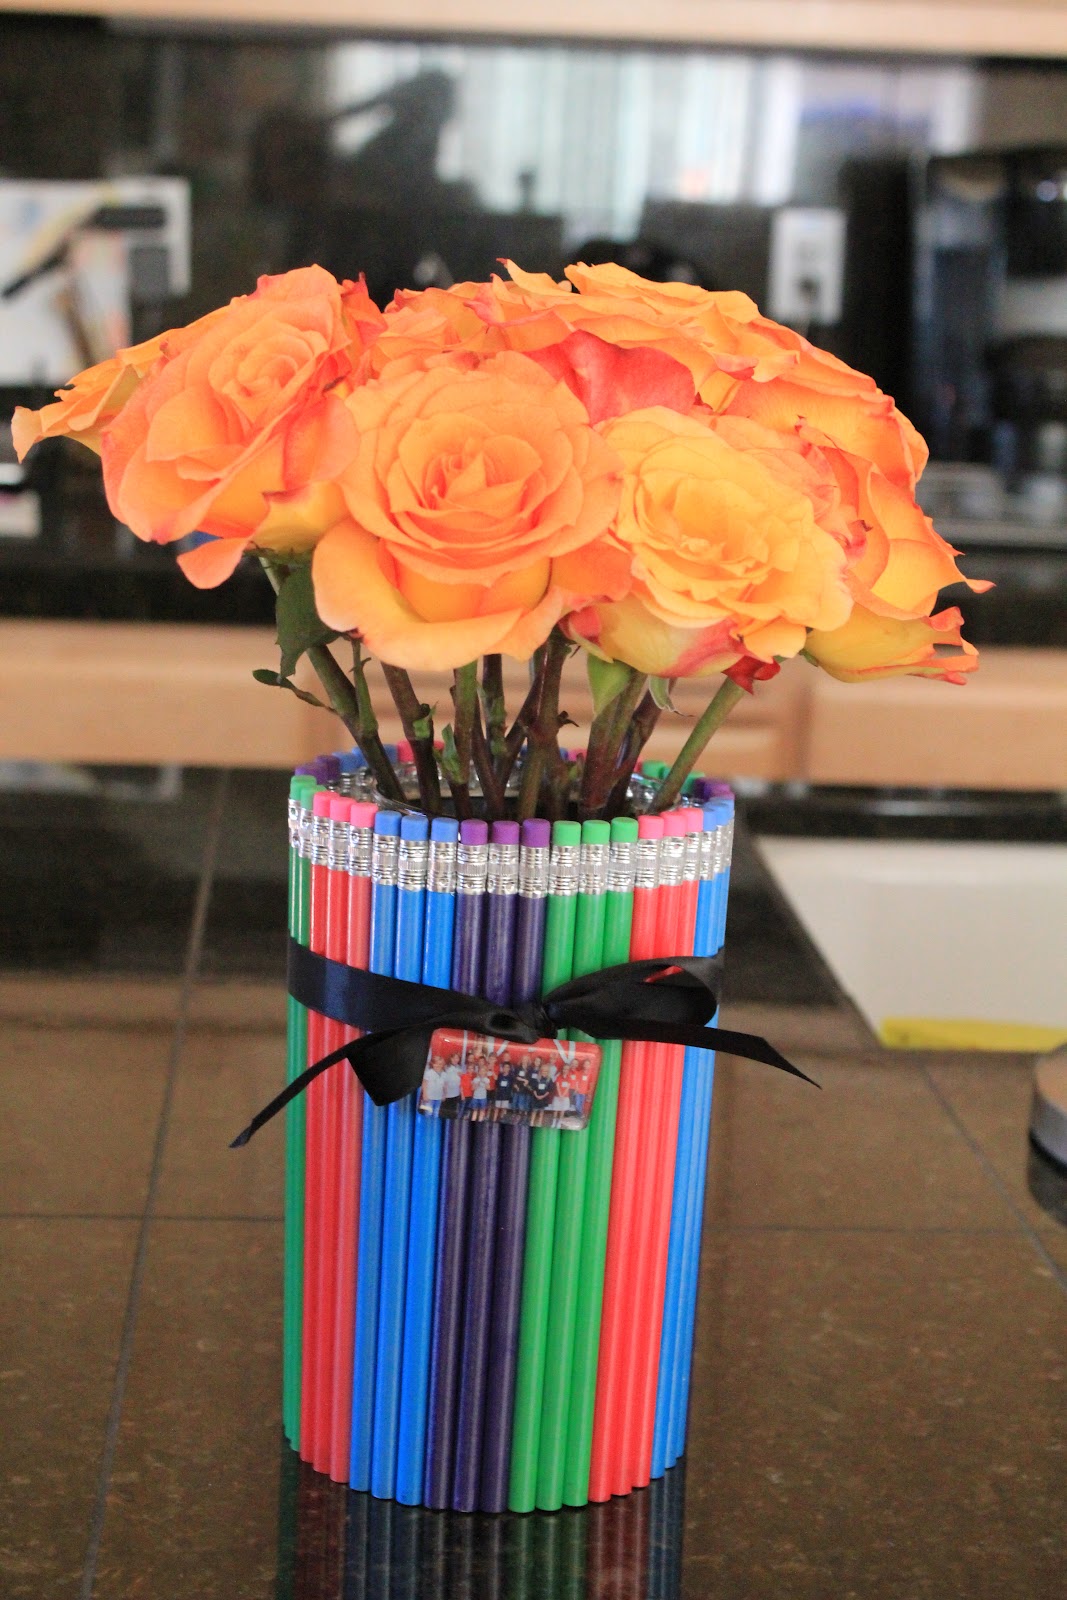
I decided to make the adorable pencil vase for my daughter's 1st grade teacher.  I went to the dollar store and bought 3 packs of pencils ( they happen to have colored pencils) and a glass cylinder insert.  I used a can of pepperidge farms pirouette cookies I had in my pantry for the outside of the vase.  I used hot glue to glue the pencils to the metal tin.  I was afraid the hot glue might not stick - it might cool before I had a chance to attach the pencil.  This was not the case at all.  To be honest, I had to pull off a couple of the pencils since they weren't lined up as straight as I would like - and it was very hard to pull off the pencil.  I don't think the pencils are going anywhere!  And by using the glass cylinder to put the water and flowers in it should be easy for the teacher to clean it after the flowers die and will eliminate the chance of the tin can rusting.  I hope it will be usable for many years. 

I then made a glass pendant with a photo of the class.  I had bought the supplies for the pendant before Christmas.  I had made a few before so I knew I could make one in about 5 minutes.  It turned out super cute and hope it is something the teacher will enjoy for years to come.

Here is my finished product:


Here are my pins:

Pin for the vase:


Pin for the pendant:

Friday, March 16, 2012

St. Patrick's Day 2012

When my daughter's teacher asked me to throw a St. Patrick's Day party, I knew right were to look for ideas!

I made rainbow j-ello. It turned out so cute. It is not hard to make, it just takes a lot of time. I started Wednesday night to have them ready for lunch Friday. I bought clear plastic glasses and all 6 colors of the rainbow packs of j-ello. I made 20 cups and needed 2 packets of each j-ello color. I used the quick set method on the back of the label so I only needed to wait 1 hour in between layers instead of 4 hours. I started with purple and worked my way up to red. They seemed to go over great with the kids and I must say I enjoyed a cup as well!!!

This is what my cups looked like:


The original rainbow j-ello pin:

Wednesday, March 14, 2012

Crockpot Italian Chicken

I tried this crock pot recipe and it was a winner with my whole family! Here is the recipe:
Put 4 chicken breasts in the bottom of your crock pot. Sprinkle with salt and pepper on each side. Pour 2 cans of Cream of Chicken soup over chicken. Cut 1 bar of cream cheese into small cubes and put on top of soup. Sprinkle with a packet of zesty italian salad dressing seasoning. Cook on low for at least 4 hours (I've had it go as long as 10 and it was still yummy). Shred chicken and serve, with sauce made, over pasta or rice.

Here is the original pin: